
 lula
lula Making fruit jams transforms fresh, seasonal produce into shelf-stable preserves you can enjoy year-round. The process combines fruit, sugar, and acid (usually lemon juice) in specific ratios, then heats the mixture until it reaches the gel point at 220°F. With basic kitchen equipment and about 90 minutes, beginners can produce professional-quality jams that rival anything from specialty stores.
The magic happens through pectin, a natural substance in fruit that forms a gel when combined with sugar and acid at the right temperature. Some fruits like apples and citrus contain plenty of pectin naturally, while others like strawberries and peaches need added pectin to set properly. Understanding this chemistry makes the difference between runny syrup and perfect, spreadable jam.
Home jam making offers control over ingredients that store-bought versions can’t match. You decide the sweetness level, skip artificial preservatives, and experiment with flavor combinations limited only by your imagination. Mixing fruits with herbs, spices, or even a splash of wine creates signature preserves that make thoughtful gifts and elevate everyday meals.
Safety matters significantly in jam making. Proper canning techniques prevent spoilage and potential foodborne illness, so following tested recipes and sterilization procedures isn’t optional. The good news? Once you master the fundamentals, the process becomes second nature.
Many families discover that jam making works beautifully as a group activity. Kids can help wash fruit, measure ingredients, and decorate labels, turning kitchen time into lasting memories. Local workshops often teach these skills hands-on, giving newcomers confidence before attempting projects at home. Whether you’re preserving a bumper crop from your garden or simply want pantry staples with real fruit flavor, making jams proves surprisingly accessible and deeply rewarding.
What You’ll Need: Tools and Ingredients for Jam Making
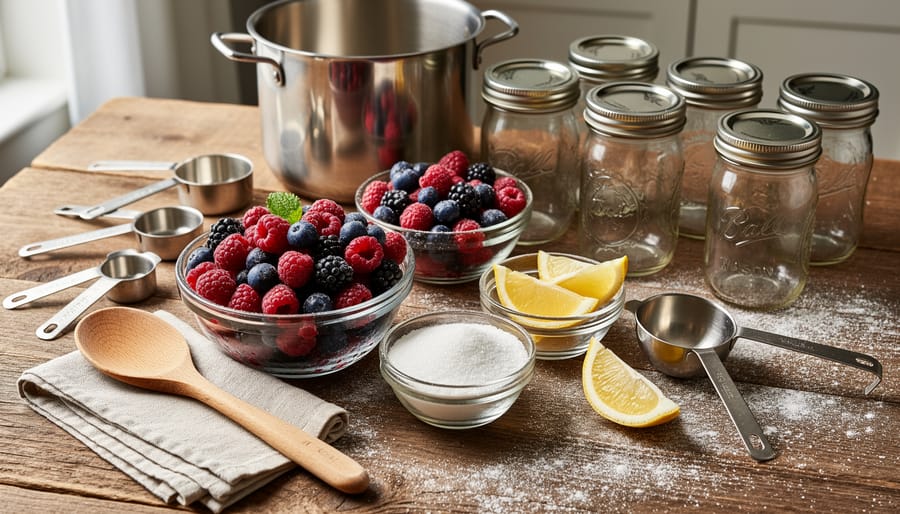
Before you start making fruit jams, gathering the right tools and ingredients will make your first batch much smoother. You don’t need a commercial kitchen, most items are common household goods or inexpensive additions, but having everything ready before you begin prevents rushed trips to the store mid-recipe.
Essential Equipment and Supplies
- Large heavy-bottomed pot (at least 8-quart capacity) to prevent scorching
- Candy or digital thermometer that reads up to 220°F for accurate gel point testing
- Glass canning jars with two-piece lids (half-pint or pint sizes work best for most batches)
- Jar lifter or silicone-coated tongs for safely handling hot jars
- Wide-mouth funnel to minimize spills when filling jars
- Large metal ladle for transferring hot jam
- Wooden spoon or silicone spatula for stirring
- Clean kitchen towels for wiping jar rims
The heavy-bottomed pot matters more than you might think, thin pots create hot spots that burn sugar quickly, ruining your batch. If you’re just starting out and don’t have a candy thermometer, you can use the freezer plate test method instead, though a thermometer removes guesswork. New canning jars cost a few dollars each, but if you have old jars with chips or cracks, skip them; damaged jars won’t seal properly. Jar lifters prevent burns and dropped jars, but thick oven mitts can work in a pinch if you’re careful.
Core Ingredients
For a basic fruit jam, you’ll need fresh or frozen fruit (about four cups prepared), granulated white sugar (typically equal amounts to fruit, though recipes vary), powdered or liquid pectin if your fruit is low in natural pectin, and fresh lemon juice for acidity. Low-pectin fruits like strawberries and peaches need added pectin, while high-pectin options like apples and citrus often don’t. Sugar isn’t just for sweetness, it’s essential for preservation and achieving the right gel texture, so substitutions require recipe adjustments. Start with these basics, and you’ll have everything needed for your first successful batch of homemade jam.
Safety First: Important Precautions Before You Start
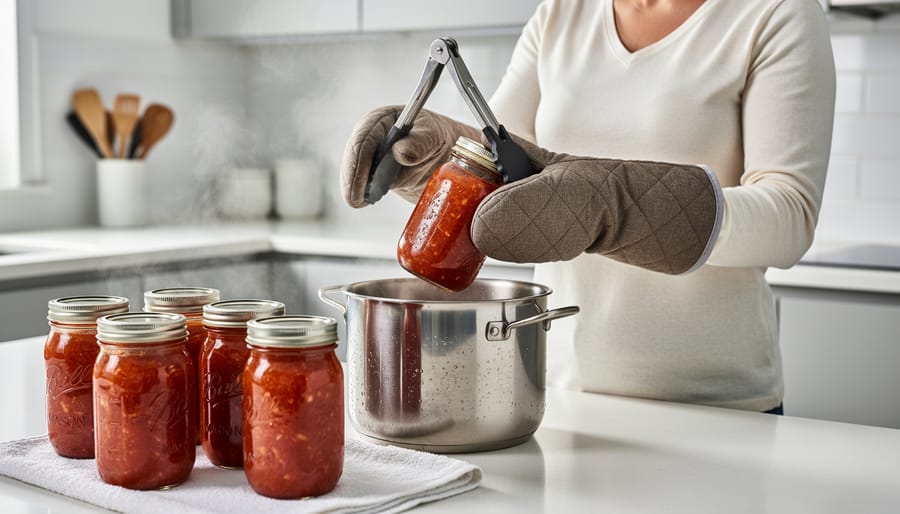
Before you start making fruit jams, take a moment to understand the real hazards in your kitchen. Boiling sugar reaches temperatures above 220°F, far hotter than boiling water, and sticks to skin, causing severe burns that won’t wash off easily. Keep children and pets well away from your workspace, and never leave boiling jam unattended. Wear long sleeves and closed-toe shoes to protect yourself from splashes.
Proper sterilization isn’t optional; it’s your defense against mold, yeast, and harmful bacteria. You must sterilize empty jars by boiling them for ten minutes (longer at high altitudes) and keep them hot until you’re ready to fill them. Inspect every jar for chips or cracks before use, damaged jars won’t seal properly and can break during processing. Lids should be new each time; while you can reuse screw bands, the sealing compound on lids only works once.
Safe canning practices protect your family from serious illness. Home-canned foods face a real botulism risk without proper processing though high-sugar jams are naturally safer than low-acid foods. Always process filled jars in a boiling water bath for the recommended time, adjusting for your altitude if you live above sea level.
Handle hot jars with proper jar lifters, not kitchen towels that can slip. Place filled, sealed jars on a towel-lined counter to cool, never on cold surfaces where thermal shock can crack them. If you’re running a jam-making workshop with families, assign one adult to manage the stove while others handle the safer tasks of washing fruit or preparing jars.
The Jam Making Process: Step-by-Step Instructions
Preparing Your Fruit and Workspace
Start by choosing ripe, unblemished fruit at the peak of freshness. Slightly underripe fruit actually works better for jam making because it contains more natural pectin. Avoid overripe or bruised specimens, as they can introduce bacteria and affect both flavor and texture.
Wash your fruit thoroughly under cool running water, even if you plan to peel it. Pat dry with clean towels, then remove stems, cores, and any damaged spots. For berries, a quick rinse in a colander works perfectly. Chop larger fruits like peaches or apples into uniform pieces about half an inch across so they cook evenly.
Before you begin cooking, sterilize your jars and lids by submerging them in boiling water for at least 10 minutes. Keep them in the hot water until you’re ready to fill them. Your ladle, funnel, and any utensils that will touch the jam should also be sterilized.
Set up your workspace near the stove with everything within arm’s reach. Place a clean towel on the counter for setting down hot jars. Position your sterilized equipment, a bowl for skimming foam, and your prepared fruit near your cooking pot. Keep pot holders and your jar lifter close by.
Fill a large pot with water for the final water bath processing and start heating it now. Having it ready when your jam finishes cooking keeps the process moving smoothly and safely. This organized approach prevents scrambling with hot jam waiting in your pot.
Cooking Your Jam to Perfection
Combine your prepared fruit and sugar in a large, heavy-bottomed pot, a deep pot prevents dangerous boil-overs as the mixture bubbles vigorously. Stir the mixture over medium heat until the sugar dissolves completely, which usually takes about five minutes. You’ll know it’s ready when you can’t feel any grit when you drag a spoon along the bottom.
Once dissolved, increase the heat to medium-high and bring the mixture to a rolling boil. Add pectin or lemon juice now if your recipe calls for it. The jam needs to reach 220°F (or 8°F above your local water’s boiling point if you’re at high altitude) to set properly. Clip a candy thermometer to the side of the pot, making sure the bulb doesn’t touch the bottom, and watch it closely. This stage typically takes 15 to 25 minutes, depending on your fruit’s water content.
While the jam cooks, stir frequently to prevent scorching, scraping the bottom and sides. You’ll notice the mixture thickening and the bubbles becoming glossier and slower. When the temperature approaches 220°F, start testing for doneness using the plate test: place a small plate in your freezer beforehand, then drop a teaspoon of hot jam onto the cold plate. Let it sit for 30 seconds, then push it with your finger. If it wrinkles and doesn’t immediately run back together, your jam has reached gel stage. If it’s still runny, continue cooking and test again in two minutes.
Don’t worry if your jam looks thin in the pot, it will thicken considerably as it cools. However, if it seems too thick during the plate test, you can stir in a tablespoon of water. Once you’ve confirmed the right consistency, remove the pot from heat immediately. Skim off any foam from the surface with a metal spoon before filling your jars, as foam can interfere with proper sealing.
Filling and Sealing Your Jars
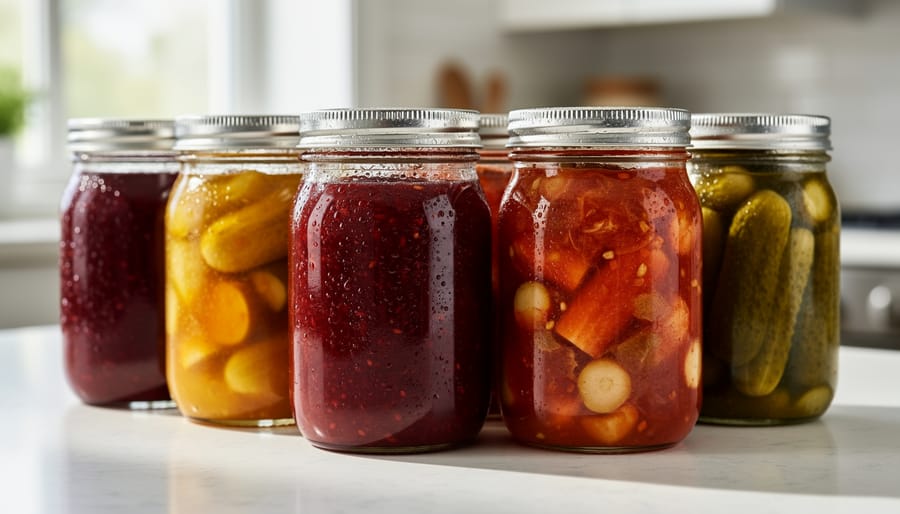
Once your jam reaches the perfect gel stage, you need to jar it quickly while it’s still hot. Work in small batches to keep the jam at the right temperature throughout the filling process.
Filling Your Jars Properly
Using a wide-mouth funnel makes this step much cleaner and safer. Ladle the hot jam into your sterilized jars, leaving exactly 1⁄4 inch of headspace at the top. This precise gap is essential for proper sealing during processing. Too much headspace and the jar won’t seal; too little and jam may seep out during boiling.
After filling each jar, run a clean plastic spatula or bubble remover tool around the inside edge. Slide it gently between the jam and the glass to release any trapped air pockets. These hidden bubbles can interfere with sealing and reduce shelf life. Wipe the jar rim thoroughly with a damp, clean cloth to remove any sticky residue that could prevent the lid from sealing.
Applying Lids and Rings
Place a sterilized lid on each jar, centered carefully so the sealing compound lines up evenly with the rim. Screw on the metal band until it’s fingertip tight, snug but not forced. Over-tightening actually prevents air from escaping during processing and can cause seal failure.
Water Bath Processing
Lower your filled jars into the canner using a jar lifter, keeping them upright. The water should cover the jar tops by at least one inch. Bring the water to a full rolling boil, then process for 10 minutes (add one minute for every 1,000 feet above sea level). Start timing only after the water reaches a hard boil.
When time’s up, turn off the heat and let jars sit in the canner for five minutes before removing them. Transfer jars to a towel-covered counter, spacing them apart so air circulates. You’ll hear the satisfying “ping” of lids sealing as they cool over the next few hours.
Testing Your Seals and Proper Storage
After your jars cool for 12 to 24 hours, it’s time to check whether they sealed properly. Press the center of each lid with your finger. A correctly sealed lid won’t move or make a popping sound. If the lid flexes up and down when pressed, the jar didn’t seal.
You’ll also notice that sealed jars have a slightly concave lid, where the center curves inward. Remove the screw bands and gently try to lift each jar by its lid alone. A proper seal will hold the weight of the full jar without coming loose.
Jars that didn’t seal aren’t ruined. You have two options: refrigerate them immediately and use within three weeks, or reprocess them. For reprocessing, check the rim for nicks or food residue, wipe it clean, add a new lid, and process again in the water bath for the full recommended time. Don’t reprocess the same jar more than once, as the jam’s quality will suffer.
Store properly sealed jars in a cool, dark place like a pantry or cupboard. Ideal storage temperature is between 50°F and 70°F. Avoid areas near the stove, dishwasher, or in direct sunlight, as heat and light degrade the jam’s color and flavor. Under these conditions, your jam will maintain peak quality for up to one year.
Once you open a jar, refrigerate it and use within three to four weeks. Always use a clean spoon each time to prevent introducing bacteria that could cause spoilage.
If you notice mold, fermentation bubbles, or an off smell in any jar, sealed or opened, discard the entire contents without tasting.
Understanding Jam Setting: The Science Behind the Process
Understanding Jam Setting: The Science Behind the Process
The magic behind jam setting isn’t really magic at all. When you heat fruit with sugar, pectin molecules, naturally present in fruit or added separately, begin linking together to form a mesh-like network. This network traps liquid and creates that signature spreadable consistency we love in jam.
Pectin needs help to do its job properly. Acid, usually from the fruit itself or added lemon juice, lowers the pH and allows pectin molecules to bond effectively. Sugar draws out moisture from the fruit and helps the gel structure form while acting as a preservative. Think of it as teamwork: pectin builds the framework, acid makes the connections possible, and sugar holds everything together.
Some fruits come naturally loaded with pectin, apples, citrus fruits, and cranberries are pectin powerhouses. Others, like strawberries, peaches, and cherries, contain less pectin and benefit from commercial pectin or a splash of high-pectin juice. That’s why recipes often call for added pectin with certain fruits.
Environmental factors matter too. At higher altitudes, water boils at lower temperatures, which can affect gel formation. You might need to cook your jam slightly longer to reach the proper consistency. High humidity can prevent proper evaporation during cooking, potentially resulting in softer jam. Understanding these variables helps you adjust your technique and troubleshoot when results don’t match expectations.
Common Questions About Making Fruit Jams
How long does homemade jam last?
Properly sealed and stored jars can last 12-18 months in a cool, dark pantry. Once opened, refrigerate the jam and use it within three to four weeks for best quality.
What fruits work best for beginners?
Strawberries, raspberries, and blackberries are excellent starting points because they’re naturally high in pectin and forgiving to work with. Blueberries and peaches also yield reliably good results for first-time jam makers.
Can I fix jam that turned out too runny?
Yes. Pour the jam back into your pot, add a bit more pectin or lemon juice, and bring it to a rolling boil again for one to two minutes. Retest for gel stage before refilling clean, sterilized jars.
Can I reduce the sugar in jam recipes?
You can reduce sugar slightly, but cutting too much affects both texture and preservation. For significant reductions, use low-sugar pectin varieties specifically designed to gel with less sugar.
Beyond these basics, many families wonder whether they can substitute honey or alternative sweeteners for white sugar. While possible, keep in mind that sugar plays multiple roles, it helps jam set, acts as a preservative, and balances the fruit’s natural acidity. Substitutions often require recipe adjustments and may result in softer, less stable jam that needs refrigeration.
If you’re working with frozen fruit instead of fresh, you’re in luck. Frozen fruit works beautifully for jam making and can actually be more convenient than fresh, especially for out-of-season varieties. Just thaw the fruit completely and drain excess liquid before cooking, then proceed with your recipe as usual.
For those attending jam-making workshops or trying this at home with kids nearby, a common question is whether children can help safely. Absolutely, younger family members can wash fruit, measure ingredients, and label jars. Just keep them away from the stove and hot jars, and assign age-appropriate tasks that make the experience enjoyable for everyone.
Don’t worry if your first batch isn’t perfect. Even experienced jam makers occasionally end up with runny or overly firm results. Each batch teaches you something about how your stove heats, how your fruit behaves, and how to recognize the right moment to stop cooking. That hands-on learning is what makes jam making such a satisfying kitchen skill.
You now have everything you need to start making fruit jams at home. It’s a genuinely rewarding project that connects you with the food you eat, fills your kitchen with incredible aromas, and gives you something tangible to share with friends and family. Whether you’re picking berries from your own garden or grabbing seasonal fruit at the farmers market, transforming that produce into homemade jam is both practical and satisfying.
If you’re feeling uncertain about tackling your first batch alone, consider attending a jam-making workshop. Many home and garden shows, community centers, and local farms offer hands-on sessions where you can practice the techniques in a supportive environment. You’ll get immediate feedback, watch experienced preservers troubleshoot in real time, and meet other people who share your interest in DIY kitchen projects.
Once you’ve mastered the basic process, experiment with different fruit combinations, strawberry-rhubarb, peach-ginger, or mixed berry blends can become family favorites. Keep notes on what works well so you can refine your recipes over time.
The key is following proper safety practices and being patient while you learn. Your first batch might not look perfect, but it’ll still taste far better than most store-bought options. With each round, you’ll develop a better feel for when the jam has reached the right consistency and how to adjust for your specific fruit and climate. Start simple, stay safe, and enjoy the process.